Admin Control Panel

New Post | Settings | Change Layout | Edit HTML | Moderate Comments | Sign Out

Monday, July 6, 2009

Ptitsa - My HBK2 Reincarnation

Assalamu'alaikum,

Hi there, looks like I have 2 parallel RC Helicopter stories going on .. both are very interesting stories, at least for me. :) So here is Ptitsa[1] story.

I was having problem with one of the new purchased Hitec HS-55 servo. The solution was, brought it back at the shop where I bought it, RcSmart (rcsmart.com.my). After satisfied with my explanation and tested himself, the sales person replaced the malfunction servo with a new one. I also bought new plastic linkage for Ptitsa and a gallon of Nitro fuel (15% helicopter type) for Torii.


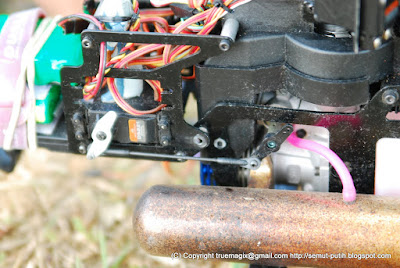
At the night, I put up the new servo, then I readjust the servo centering for all of the servo as well. I discovered that the plastic which holding the swashplate from rotating was touching with the new bell mixer assembly. I need to force bent it with my hand to make it clear from the rotating path of that piece.

Next morning (Wednesday), I was planning to try it out. With everything setup, I started to increase the throttle. Unfortunately, the motor seems refuse to rotate. When I tried to rotate it manually with my hand, I can just do it one way only. Puzzled with the situation I keep wondering, was the motor damaged or the main gear or the new head assembly stuck somehow. I keep trying a few more times, till the motor rotated for about one second and stop. This time looks like the motor has stuck for good, both ways!

At the night, I unscrewed the motor, took it out from the frame and try to troubleshoot again. Hoping for the best (motor can still be used, please), I keep trying this and that. After I knocked the motor gently a few times onto my house floor, I was able to rotate it with my hand. After a while of trying, I noticed there was something inside the motor. I took it out, it was something like a small washer, which I think had fell into the motor without me noticing. With that small-unnoticed-which-has-made-me-wondering-for-whole-day-thing outside of the motor, I have the motor running as normal!! Alhamdulillah. I am using out runned 3800kv motor[2] which is quite expensive to be replaced and thank god, I don't have to replace it!

Saturday morning (4-July-2009), I was really waiting for the moment so see my HBK2 Ptitsa flying again. It has been quite sometimes and it has been lots of new parts put into Ptitsa, I need to see it flying! At the night before, I was thinking, I can't risk Ptitsa crashing again. The control seems to be very erattic, how am I going to control it? Furthermore the controls are not yet calibrated to its center. After a lots of thinking I have decided that I need to put away my ego and back to the basic!! "Better safe than sorry" words also applied here. I decided to be back with the trainer[3]. Yes, I still have the trainer set I used about 11 month ago.. hmm that was already almost a year!

Ok. So, I put the trainer on. Brought Ptitsa to the front of my house.


I started to increase the throttle, the main rotor spin as expected. Lifted off successful. I was focusing very hard to maintain Ptitsa in hover, and I can't get it hovering at same place in stable way, and the vertical movement was very erratic. Ptitsa was very wild, she just want to fly everywhere, controlling Ptitsa was very difficult!! The tail was not really holding at same direction too, it tend to rotate clockwise. I ended the session after a few tries, need to think how to proceed with this.

Saturday night, I was at my in law house. The house have sufficient space for me to test Ptitsa.


I have configured the controller to put some EXP and DUALRATE% for the controls. After lots of thinking I started to notice that Ptitsa wild movement could very likely due to high head speed. I remembered that the last time I flew the HBK2 properly, I was using its original Radio Controller and it was in "normal mode". I reduced the head speed[4] and the response was much better. Ptitsa was not that wild anymore. Yes, Ptitsa is back, its flying!!


I still have to put lots of focus to put Ptitsa into stable hover. Ptitsa is very light compared to Torii, any slight movement it will accelerate very fast in that particular direction, so the counter control need to be fast as well. After a few short hovers, I started to get used to control rate needed and feel more comfortable. Currently I still flying Ptitsa with the trainer gear. I still need fine tune Ptitsa bit more, tail is still rotating/drifting clockwise.

Hmmm.. huh, there is one more unknown! I noticed after a stable hover for about 30 seconds, Ptitsa suddenly rotate counter-clockwise 90 degrees. I was quite panic when that happened for the first time! It seems that there is a sudden head speed increased. I'll have to check and confirm the problem and find the solution.

That's all for a now.

::truemax

---Footnote
[1] Ptitsa is my Remote Radio Controlled Helicopter, it is a Honey Bee King 2 with upgraded swashplate and motor. I just recently put new metal rotor head into it.
[2] Honey Bee King 3 come standard with 3000kv motor, my Honey Bee King 2 standard motor was even lower. So this is really a very good finding for me.
[3] Helicopter Trainer is 4 ping pong ball attached to 4 rods, attached to the helicopter skid to make it harder to tilt, normally used by beginner in first few days (or weeks) in learning to fly RC Helicopter.
[4] Head speed is reduced at the throttle pitch configuration, at this moment I have 100% as 65%, 50% as 45%

Read more...

Torii Test Flight - Passed

Assalamu'alaikum.

[This event happened between 25 Jun to 28 Jun 2009]

Alhamdulillah, from the previous short test flight, Torii[1] was able to fly without any problem. However I felt the flight characteristic was very different. The rate of climb was very low, and the head speed seems to be slower than normal.

On last Sunday evening, about 6.30pm, I brought Torii to Putra Heights Flying Field 2. It was already quite late and I don't have much time to spend for the flying session. I had checked Torii's blade pitch at the earlier night to ensure that the slow climb rate and slow head speed is not due to that.

When I reached the field, I quickly prepared Torii for the flight. This time, I opened up the canopy to check the screws. Need to make sure all the screws are not loose.


This is the lesson learn from Torii's last hard landing. After satisfied with the condition. I tried to start the engine. The engine was harder to start this time. I got it hydro-lock-ed once, and need to rectify it by opening the glow plug and run the starter a few times without it. I managed to get the engine started, after I moved up the throttle a bit. This was the first time I need to do this during the starting up of the engine. I was wondering why was it so.

Proceeding with the test flight, I carried Torri 10 m to a clear area at the field for the take off. After completed control check on the ground, Torii lifted off successfully without any problem. Another quick check on the controls during hover confirmed that the controls are ok. Tested with normal figure 8 flight. I noticed that there was lots of smoke came out from the muffler. Landed the Torri, then checked the engined temperature and turn the High Speed Needle (HSN) at it OS 50 Hyper Engine to make the mixture leaner. Lifted off again to continue with the testing. This time the flight was much better and Torri has its normal climb rate back!

Continue with figure 8 flights, till the main tank almost empty. I taxi[2] Torii to the normal landing spot, among the trees.

Yes. Successful test flight for Torii.

In conclusion, the slow response in flight and low climb rate for Torri was due to rich mixing of fuel.

::truemax

---Footnote
1. Torii is my Remote Radio Control Helicopter, its a Century Raven 50 CCPM
2. Taxi for Helicopter is to fly slowly at low altitude, normally to the exact landing spot or exact cleared take off spot.

Read more...

Tuesday, June 30, 2009

New Parts for HBK2 - Ptitsa

Assalamu'alikum,

I had enough problem with my Honey Bee King 2. Well, I have decided to change the name for HBK2 to Ptitsa. *smile* *smile*

I have thinking for quite sometimes, what the name should be, now I found it. Ptitsa.

With the slope at the main rotor head and even at the servos movement, I was not able to fly the helicopter, not even make it hover at one spot in a controlled manner.

Due to that reason, I have ordered a complete set of metal rotor head for Honey Bee King 2 (or Honey Bee Belt CP) and 3 servos as well. I have chosen the normal and cheap Hitech HS-55 Sub micro servos which are the same size as the original servos, with the assumption that they will be better in quality and will be able to last longer.

I got all the parts on Saturday morning [27-Jun-2009]. Right in the evening I started to put the parts together.

3 new servos on the left and metal head parts on the right

Started with the servo, I begin to take out the original servo and put in the new one, one by one. Once I have put in the 3rd servo, I tried to power it up. Hmm.. unfortunately the servos' horn was not centered and moved aggressively to their center position (which was way up or down compared to the helicopter). I need to take them out and center them. In the process of doing so, I discovered that one of the servo is not working properly. It only move in one direction. I will need to bring thing back to the hobby shop and get a replacement.


The original metal head set, I have an upgraded metal swash plate

After that I decided to continue with the head assembly. I was thinking very hard, how should all these parts put together. I felt confident to figure out myself without the manual and started to disassemble the original parts. I was able to put most of it together except for the new metal blade grip. This is because it needs 2 of the smallest Allen Key (I only have one). Furthermore it was already quite late, about 3.30 am, and I was not confident enough on the correct direction for the parts in central head assembly and their linkages to the blade grips. So I decided that I need to find a reference. Lucky for me I found it using Google. The full instruction manual is available here (http://www.hhq.com.au/store/downloads/hbk2_manual.pdf). About 8MB in size.

On the next morning, I continued to assemble the parts by referring to the diagram. Lucky for me I found a small Allen Key in my tool box, with it I was able to fit in the main blade grip too!


Now, what left is only one problematic servo, which need to be replaced. However, I noticed that the plastic linkage (reused from original parts) have some slopes too. Probably I will able to get replacement for these linkage as well.

Hope that Ptitsa will be flying soon.

::truemax


Read more...

Saturday, June 27, 2009

Torii Quick Test Flight

[This test flight was done on Friday 20-Jun-2009]


Assalamu'alaikum,


I had conducted a quick test flight to confirm if the clutch is ok and Torii still able to fly with the existing clutch.

I was about 6pm Friday.


I prepared for the test flight as usual. I was pretty confident that it will be able to fly. I have tighten the screws, the gears and clutch should be engaged properly. Also I have adjusted the swash plate to ensure it is level - manually using my eyes.


I was able to start the engine without any problem. Incresed the throttle slowly while checking the control response. All are ok. Lifted off and bring it to hover at about 1.5 m hights. Checking the control response again. Everything is ok. I need to adjust the trims to make it hover easily. It need trim backward and to the right quite a bit.


Testing Torii doing climb revealed that the tail did not stay in the same direction. Sudden increase in throttle and blade pitch for the climb will make the tail drift to the right. I suspect this is due to low headspeed which resulted from to much of main blade pitch value. Tested this few times, found the behave consistently as mentioned.


I did a number 8 flight before taxi it to the trees area. Landed safely. Alhamdulillah.


Conclusion: Clutch and gears seems to be ok. Need to observe in more aggressive flights.


::truemax

Read more...

Monday, June 22, 2009

Fixing Torii

Assalamu'alikum,


As per my previous posts, both of my RC Helicopters are grounded. I have ordered replacement metal rotor head for HBK2 and did some fixing for Torii.

For Torri, I have bent feather shaft or spindle bar, broken vertical tail fin and suspected clutch issue.


Splinder bar, new and bent


Here is where splinder bar located, it holds both of the main rotor blade grips together.


Still have the problem with blade grips bearing, however it still can be reused.

From Remote Control Helicopter - 2009

glueing the vertical tail fin

During the checking and taking out the upper part of the frame, I discovered that there are quite number of screws has been loose. Looks like I have been flying Torri with loose screws. And these screws includes the screw for engine to engine Mounting and the mounting bracket to the frame, these are very critical parts!

While I was trying to open the clutch bell, I have used excessive force at the metal turbo fan and has broken one if its blade. Ouch!! The clutch bell seems to attached to the engine shaft very very tight.


I have tested the engine (and clutch) without the upper part of the helicopter and it seems to work fine.


It was quite tricky since I need to adjust the throttle level manually using my hand, instead of from the controller and the servo. Minor movement of the level give big adjustment to the running engine. After trying for about 7 times, I satisfied that the clutch should still be working. That means the crash was due to the loos screws at the engine, it has allowed the engine to moved resulted counter gear slipped out from the clutch bell gear. This is what I believe happened.

I assembled everything back, ensured all screws are tight and did a quick test. It was on Thursday 18 Jun. The engine started ok, and the clutch seems to be ok too. How do I know? I can see the engine started to rotate the main blade when I increased the throttle. However this time I was not able to take off, the trim was too much off the center. I remembered that I did not really ensure the swash place is really level. So after the test session, I spent some times to level the swash plate. Now it should be able to fly. :)

::truemax

Blogged with the Flock Browser

Read more...

Thursday, June 11, 2009

Torii Story Continues

Assalamu'alaikum.

In parallel with fixing and flying HBK2, I still continue to maintain my Torii as well. Yes, no way I am going to just put it aside.

[4-Jun-2009 Thursday]

Well, before I went back to my home town in Kelantan, I did a quick flight for Torii to make sure the engine (and other parts as well) are still good. I did not even add up any more fuel into the tank, instead I just continue to uses the existing fuel inside Torii where it still have the header tank full.


Started the engine no problem, I increased the throttle, took off and bring it to hover. I think it was just about 30 seconds of hover, then I landed, where the full was almost finished!

[10-Jun-2009 Wednesday]

Today was still on leave, did some shopping earlier with my family. At the late evening, I took a time to fly my Torii.


During engine start up, I have mistakenly connected the +ve and -ve starter wire incorrectly to the battery, resulted that starter run backward! I just realized this after a few tries, luckily have not damage any part yet! Hmmm I need to be more careful next time. I have not made this mistake before, but if not careful it can happen again.

Then, started the engine ok. As usual, did on the ground control check, then took off success fully, did in-flight control check, everything is just fine as usual, switched to idle-up mode and continue flying. Did a few figure 8 flights.

Just before the take off, when the engine was running high enough, I notice there was high pitch knocking sound, something like ting ting ting, very rapidly. However I did not suspect anything serious.

After the figure 8 flights, I continued with stall turns. However, on the third stall turn, when trying to recover during Torii started to drop I noticed that the engine suddenly running at high pitch, the main rotor is not speeding up to level out Torii's flight. Oh my god, remembering may 2 previous major crashes with the same simptomps I quickly initiate auto-rotation (in the panic state), managed to slow down the rate of descend when Torri dropped to the ground. I was very hard landing, with broken vertical tail fin (again!) and bent spindle bar. Luckily there was no other damage.

Here is the photo at the hard landing location.


The engine was still running after the hard landing, I was able to try out and it seems that the clutch was slipping. I'll need to confirm this further.

::truemax

Read more...

Wednesday, June 10, 2009

Honey Bee King 2 Fix and Successful Lift Off

Assalamu'alaikum.

[4-Jun-2009 Thursday]

Continuing from the damage state of my Honey Bee King 2, here were the fixes I made:
1. Replaced of fly bar
2. Replaced the broken piece of bell control arm set
3. Replaced the main rotor blade
4. Glued the broken front skid

As the size permit, I was able to brought it back to my home town in Kelantan which is about 450km from my house (I drove there).


[14-Jun-2009 Sunday]

At my home town, Kadok Kelantan, I did the test flight.

I have it prepared, everything was ready, I utilized a big space where we used to play badminton/sepak takraw/ tennis at my mothers house.

I slowly increased the throttle, taking my own time and have the feeling of how the tail response. The response is not really consistent, however the gyro was able to hold the tail at the same direction at high rotor speed. I increased the throttle further and have the HBK2 light on its skid and then have it tilted to its right, standing on its right skid, balancing it with my stick control. I hold it for a while to ensure that is was really stable.


Then I continued to do the lift off. Yes, it was a successful lift off, however I do not brave enough to fly the helicopter above 6 inch! I don't feel the control was stable enough, it was quite erratic. Landed and did another take off till the battery low warning buzzing out.


Yes it was a successful lift off for my Honey Bee King 2!

[8-Jun-2009 Monday]

On the next morning, I was ready to test out the HBK2 again. This time I was more confident and hoping to get it flying higher and probably holding at hover for longer time as well.

Same location, I made all the setup. Did the lift off, however suddenly I found that HBK2 move very erratically. I was not able to composite for the movements. My attempt to correct it either not enough or I did over correction to the flying, resulted it crashed to the near by small trees. :(

I have only the main gear and main blades damaged.

I guess I was just over confident.

After some checking, I noticed that some pitch/roll movement of swash plate did not return back to the 'normal' position after I released the stick. The return position when I move up compared to move down the stick is different. This must be the reason why I could not hover correctly and crashed.

I will continue to investigate why is such thing happening.

::truemax


Read more...

Wednesday, June 3, 2009

HBK2 Strikes Back

Assalamu'alaikum,

It has been very long time I left my Honeybee King 2 RC Helicopter alone. I decided to fly it again. Why? It is because the size it much smaller and easier for my to bring along when I go back to my kampung.

I have fixed the broken part much earlier, that was middle see-saw like part which holding the fly bar at the top of rotor head. However after I fixed that I part, I realized that both of my Lipo battery sets has damaged and not usable.

Last week, I went to battery shop at PJ to get a new Lipo battery. I also bought new AR6100 Receiver so that I can use my DX7 Radio Transmitter with this HBK2.


Yes, because of the small size, I was able to bring the HBK2 back to my Kampung at Parit Pulai and I able to do the fixing over there. It took me quite of effort to put the new receiver and to figure out the corrent connection and setup at my DX7, especially to get the 3 main servo to response in correct direction for forward-back, left-right and blade-pitch.


After completed with the configuration, I proceed with the first test flight. It was quite shocking for me to discovered that I have configured the throtle the other way round. Luckily, no harm and no damage occur from there. My second discovery was, the main gear was already damage and not touching the motor enough. After a few test without any successfull lift off I decided that the main gear need to be replaced.

I went to the hobby shop last Monday (1-Jun-2009), bought 2 set of main gear, 1 set of main rotor blade and fly bar as well. I need keep some of these, the parts that frequently got damage/broken even in a simple crash.

I was able to put the new main gear last night.

In the test flight at about 11pm, at first I noticed that the lots of movement on the tail. I made adjustment to the gyro, reducing the gain from 85% to 40%. Yes, no more vibration at the tail.

I did the lift off. However, the tail seems to be drifted quite a lot to the right, I counter the movement with manual rudder control, however, after a few seconds it crashed!!

Lesson learn:
1. I should not have reduced the gyro gain to much
2. I should not continue with lift off before I confirm there is good tail control from the gyro

Luckily I have all the broken parts and should be able to fix it soon.


Well, HBK2 did strike the ground.. so HBK2 Strikes Back. .. errmm but I prefer for it not to strike any more thing in the future :)

::truemax

Read more...

Friday, May 29, 2009

Quick Flight at Car Workshop

Assalamu'alaikum,

This week I was pretty busy with family matters. My farther in law was sick and passed away on Sunday 24-May-2009 2.04pm (Al-Fatihah for him), for some reason I have to travel back and forth between my house in Putra Heights and the village in Parit Pulai, Muar Johor. The distance between the 2 places is about 200km.

For that reason I need to have my car in the workshop to make sure it is fit for the long distance driving. Ok, so have to make use of my waiting time at the car workshop to fly Torii. Hmmm.. just can't leave it alone :)

It was 26-May-2009. Actually I was planning to fly the Torii earlier in the morning, however it was raining. So I decided to bring Torii along to my car workshop, it is Ipin Pit Works at Taman Emas, Puchong. This is the place where I trust to fix any of my turbo car engine problem almost any problem for my one and only turbo car :).

During the control check prior to the flight, I discovered Torii has missing nut at the servo rudder ball.


Regardless, I just tighten ball screw to the servo horn and continue with the flight. It was a quick successful half tank flight.


Alhamdulillah.

::truemax

Read more...

Saturday, May 16, 2009

Another Successful Flight

Assalamu'alaikum,

Yesterday (Friday 16-May) I took half-day leave on the afternoon for some family reason. At the evening, 1800 I found myself have some extra time. After thinking very hard I decided to have a quick flight session to build up my confidence in flying Torii.

At about 1830 pm, I loaded Torii and its related equipments into my car. Before that, at home I have filled up Torii's tank fully, to save the time. Reached Putra Heights Field II about 10 minutes later, I was quite windy and there was 2 kites being flew at the field. Well, the wind would not pose any problem to my Torii. Sunset was at about 1920, so the sun was quite low on my right, giving quite clear view of the sky.

I quickly unloaded it. Did a quick check on the counter gear (which have caused 2 major crashed before) found that it is still ok.


This time I able to start the engine smoothly, Alhamdulillah. In previous session, I need to flush the engine to clear the hydro-lock, this time it just started right away. I trick is not to shutdown the engine using the switch at the Radio Controller, but to cut the fuel line. This will actually make the engine stopped due to lack of fuel, instead of lack of air.

Did lift-off successfully, hover for quick in-flight check, then I switched to idle-up mode. After that I continue with figure 8 maneuver and stall turns. This time I was much more confident than before, I was able to do full vertical stall turns. It was still not perfect, but I am improving! During the flight, I need to be very careful with the visual and coordination. At certain angle, Torri seems to be at different orientation and that is very dangerous. I keep the control smooth and slow so that I can do the opposite if I mistakenly 'process' the orientation.

Other than that, I tried a reverse flight - new for me. Hmmm I guess I'll need to practice more on this.

The session ended at about 1850, where I landed safely, with less than half tank for fuel in the header tank (almost totally finished the fuel).

Yes, another successful flight for Torii.

From Remote Control Helicopter - 2009


::truemax, over and out.

Read more...

Wednesday, May 13, 2009

Torii's Real Flight - Satisfied

Assalamu'alaikum,

[This entry described Torii flight session on Monday 11-May-2009]

Monday was a holiday for me. I was actually a replacement holiday, just for my office! Thank god, I was able to spend more time with Torii. As what I mentioned in my previous post, I have arrange with aerobrain to come over to my house and snap some photos for Torii flight session.

It was about 11.00 am. We reached at Putra Height field 2. It was already quite late, the sun already high and the environment was quite hot. The sky is clear with a bit of wind blowing intermittently.


Put down, arranged Torii and the related equipments on the grass. Filled up the tank, this time really full. When starting the engine, I have same problem as previous. The crank shaft was too heavy to be rotated by the starter. I need to take out the canopy and flush the fuel from the engine, just like the previous session. Just before I tries to start the engine again, I noticed there were 2 screws missing from the Torii, while the impact is not that major, it may impat the flight behaviour of Torii. One screw was for holding the battery tray to the frame and another one was one of the screw for Torii's skid. Luckily I have some extra screws available in my box, for that reason, I was able to replace them very quickly.


Engine started up easily after the engine flushed. Did a normal lift-off and in-flight control check. Everything was just fine. Tested the climb rate, also very good. I brought Torri to the ground, to check it's engine temperature, it was fine too. However when I spooling up for lift up again, the engine died! I need to bring the Torii to the shades to start the engine again.

This time the engine started right away. Then I did take off from the shades it self, cool but dangerous (!). I don't have enough margin for error or parts failure. But again, its really cool :)

Start spooling up the main rotor


Just before the take-off


Took-off and 'taxi' into the open space

Switched to idle-up flight mode. Yup, everything was ok. Did some figure 8 and some half stall-turns. Nice, just nice.

The fuel almost finished after about 10 minutes of flight. Landed for refueling, in the shades as well (again this is dangerous!).


For the second tank flight, I was more confident. I did was able to do figure 8 flight confidently and the stall turns as well. I even did some negative pitch test while in the vertical posture. Yes, the negative pitch responded as expected (important for inverted flight).

I was flying with confidence this time.. just enjoy the photos..


Quick in-flight check


Truemax and Torii


'Taxi' towards open space


Diving from a stall turn


Direcly above!

However, I decided not to try the inverted hover yet!


Heading towards landing location

Landed safely at about 11.45am. Decided to end the session at the completion of the second tank. I should have more practice in simulator before the inverted hover with Torii, don't want to take any risk.

Fully satisfied. :)


Note:
1. Thanks to aerobrain for all high quality photos for this session!!
2. Sorry, so many photos in this entry, can't restrain myself from sharing the excellent quality photos. Not many time I have these for Torii.

::truemax over and out

Read more...

Fixed And Very Nice Flight

[This entry is for my test flight on Saturday 9-May-2009]

I did quick test flight to make sure that the Torii still able to fly. He he he. Yes, it has been quite a while, 2 weeks I did not fly Torii and did not even start the engined. Monday will be a replacement holiday for my office, I planned to have another fly session in the morning. I have asked aerobrain to come along, to bring his sophisticated Nikon DSLR for the Monday session.

Earlier, 2 weeks ago, Torri had problem with broken vertical tail fin. I had enough of glue-and-broke-again routine, not too take any risk on this I decided to get new replacement part. Same goes to the glow plug heater. Friday afternoon, I took a quick dash to Kajang to get the replacement parts.

Here they are:


Saturday 12:10 noon (!). Yes it was already afternoon, nobody else at the field, still I continue with the session - alone.


I filled up half of the tank only. This time I planned to have a very quick flight, just to make sure there is no problem for Torii to fly.

When I tried to start the engine, my starter have difficulties to rotate the engine. I have to open the canopy, take out the glow plug, and clear the engine by running the starter while the glow plug opened.


After that, the engine can be started as normal. The engine still working fine, the new glow plug heater is great! It even show me the current glow heater battery charge level!!

I did lift off as normal, hover flight while checking the controls. Averything is just fine. I tried a few figure 8 flight, and then some half-stall turn. Still, I need to build up my confidence. It has been a while that I have not been flying the Remote Control Helicopter.


Session ended at about 12.45pm. Everything is just fine, no new issue discovered! Alhamdulillah.

::truemax

Read more...

Sunday, April 26, 2009

Broken But Torii Still Flies

Salam all,

I had some issue with Torii tendency leaning to left and moving forward during hover before.

It was Saturday, checked the center gravity, it was a bit off, but not that much. I decided to adjust the swash plate to make Torii stablized during hover. Doing this, I will able to fly Torii as usual, however I will not be able to try inverted flight on Torii. Center gravity setup is very important for inverted hover, since the 'drift compensation' needed will be reversed and since I have not done it, I do not wan't to take any risk.

Ok. So refering to thre previous setup for hover flight, I adjusted the swash plate for idle-up mode. Also, I have reconnect the whole of tail boom, just to reconfirm that the tail gear was connected firmly. I was afraid that from the last bouncing and aborted take-off (during the night test) has somehow loosen the assembly.

At about 12.00 noon, I drive Torii to the PH flying field 2. There was nobody else, other flier may have done their flights or they are doing it at the other field. Regardless, I proceed to unload Torii and the equipments from my car.
From Remote Control Helicopter - 2009


Looking around, I have the big field for my self and Torii ha ha ha. Hmm... so what? So I filled up the tank for the Nitro fuel. :) Before I filled up the fuel, noticed that there are lots of foreign dust at the fuel pump filter. Cleared it before I proceed.

Before:
From Remote Control Helicopter - 2009

After:
From Remote Control Helicopter - 2009


Starting up the engine. It has been 2 weeks (what?, 2 weeks) I have not started Torii's engine. I hoping for the best, starting the engine without any problem, hoping for the luck at my side! Plugged in the glow heater, started to press the starter switch. It rotated a bit at first, then it won't any more! Ahh looks like stucked or the engine shaft was too heavy to be rotated. Tried a few times. Oh, my glow plug heater broken again! This is the third time it broken, I have glued it for each time and able to use it, and now it is broken again! Arghhh.


If I have other flier friends around, I can ask to try their starter (and glow heater as well), it could be due to my starter or weak battery, just like Torri's previous flight. Nope, can't hope for others to help. Decided to flush the engine first. Took out the Canopy, and using the number 8 socket driver I took out the glow plug. Then I ran the starter with fuel line closed, yes, the engine shaft rotated smoothly. After that, with fuel line open, good shaft rotation as well. So, I put back the glow plug, connected the glow heater and now the engine started nicely! - Remember with the broken glow heater. Alhamdulillah.

After the engine started, I adjusted the throttle trim to make sure the engine is stable at the idle. I bring Torri to a bigger empty space for take off (since I did the engine start up under tree shades). Started to increase the throttle while checking the response on other controls. Everything was good, lifted off successfully. Put into hover and checked the controls again. Yes, everything was just fine, but noticed that Torii was tempting of moving forward. Then I changed to idle-up mode, the behaviour is the same. Did some trim adjustment for that. Tried some climb and decend movement, then I brought Torii to land (of course after change back the flight mode to normal). Checked the engine temprature, it a bit hotter than what I want, so I turned the High Speed Niddle (HSN) 2 clicks counter clockwise. At this time I have utilized about half of the fuel in the tank.

Than I started to increase the throttle again. I can see that the vertical tail fin was touching the ground. There was some vibration and movement at the tail when spooling up the main rotor, and it has broke the vertical tail fin!! I glued the fin quite sometimes ago, I was broken during the last Torii crash, now it broken again. I was calculating the risk, should I go ahead to take off or abort it. The vertical fin is very usefull to protect tail rotor from hitting the ground during take off, landing or crash. Well, I figured I am carefull enough I can make sure that the tail rotor won't touch the ground. So, I continue to increase the throttle while putting a bit of forward control to make sure the tail will be up first during the take off.


Yes, the lift off was successfull, I have Torii into hover without any problem. I continue with figure 8 flights at about 20 to 30 feet heights. Then I continue to try stall turns, but was not able to do a proper one. The sky was really bright, I did not wear my sun glasses. Also, I did not feel the Torii was stable enough. At one time it was really tempted to move forward where I need to pull back the foward stick to stop it from doing do, and at the other time/side it was not going forward unless I really push the stick forward. Well, I don't have the time and mood to figure out what was the actual reason, I could be due to Torii center of gravity or simply due to the current wind speed and direction at that moment.

Anyhow, I was not much fuel left in the tank. I bring it to hover in front of me to reconfirm the fuel level. Then I did some horizontal left and right flight, few times. Remember that I need to make sure tail rotor clearence during landing? Yes, with fuel just finish at the main tank I started to slowly bring Torri down, hovering at very low, as low as 4 inch from the ground while ensuring the tail was cleared. Landed Torri safely while still have fuel about half of the header tank.
From Remote Control Helicopter - 2009


Next, I'm thinking to get the proper part replacment for these 2 broken items. I had so many hassel because of them. Well I might, or might not get the replacement, will see.

Overall, the flying session was very successfull. Alhamdulillah.

::truemax

Read more...

  © Blogger template The Professional Template by Ourblogtemplates.com 2008

Back to TOP